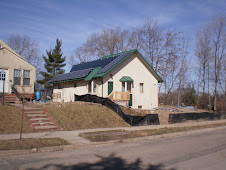
This view shows the installed bay windows in front. The windows to the right of each are bedroom windows upstairs and downstairs.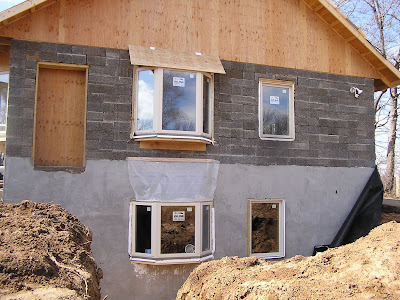 Below is my pride and joy, the cold room, which is along the back of the basement behind the laundry room. There are no heating tubes in the floor underneath, and the walls will be insulated. With no heat, and outside walls on 2 sides, I'm hoping to keep it under 60 degrees in the summer, and 45 to 50 degrees in the winter. I'll store root vegetables, squash, and apples there in the winter, as well as all my home canned goods.
 This is the view from the front of the basement to the rear, looking through the bathroom and laundry room to the cold room. The black pipes are the plumbing. You can see that there is a lot of natural light coming into the basement.
 Below are the two large heat storage tanks for the solar heat. Innovative Power Systems (IPS) is ready to start installing the solar heating system, but we still have to do some work on the inside, and the metal roof needs to go on. The roofer was supposed to start a month ago, but has come up with various excuses for the delay, which I'm not happy about. Hopefully, we'll have a roof (and it's GREEN, for the green house) in the next two weeks.
 Here, you can see the upstairs front bedroom framed in, looking through the kitchen and dining room.
 Below, the basement bedroom framed in. This photo doesn't show it, but the windows have been put in and let in just as much light as if it was above ground.
 I thought I had more up-to-date photos, but I found I didn't, so I'll take some more this weekend. Most of the rough-ins have been done for the electric, the air exchange system and AC, and the plumbing.
 Below is my pride and joy, the cold room, which is along the back of the basement behind the laundry room. There are no heating tubes in the floor underneath, and the walls will be insulated. With no heat, and outside walls on 2 sides, I'm hoping to keep it under 60 degrees in the summer, and 45 to 50 degrees in the winter. I'll store root vegetables, squash, and apples there in the winter, as well as all my home canned goods.
 This is the view from the front of the basement to the rear, looking through the bathroom and laundry room to the cold room. The black pipes are the plumbing. You can see that there is a lot of natural light coming into the basement.
 Below are the two large heat storage tanks for the solar heat. Innovative Power Systems (IPS) is ready to start installing the solar heating system, but we still have to do some work on the inside, and the metal roof needs to go on. The roofer was supposed to start a month ago, but has come up with various excuses for the delay, which I'm not happy about. Hopefully, we'll have a roof (and it's GREEN, for the green house) in the next two weeks.
 Here, you can see the upstairs front bedroom framed in, looking through the kitchen and dining room.
 Below, the basement bedroom framed in. This photo doesn't show it, but the windows have been put in and let in just as much light as if it was above ground.
 I thought I had more up-to-date photos, but I found I didn't, so I'll take some more this weekend. Most of the rough-ins have been done for the electric, the air exchange system and AC, and the plumbing.
 Today, Jeffrey picked up a small electric cement mixer I had bought. Devin, my neighbor, is going to do the majority of the parging of the interior walls, which has to be completed before I can apply the clay plaster. It's a hard, messy job. The parging is just a thin application of cement to smooth out the walls and fill in the holes in the surface of the FasWall. Because it is cement with a rough surface, the clay plaster can be applied directly to it. If I used the plaster on the interior wallboard walls, I'd have to apply a special sandy surface first to get the clay to stick to the sheet rock. I will probably paint the interior walls, and just have the clay plaster on the interior of the outside walls. Clay plaster is expensive, and a lot of work to apply.
We are planning on having the rough-in inspections next week for the electric, plumbing, HVAC, and framing. After that, we'll get the sheet rock hung, and then finish the first floor radiant infloor heating installation.