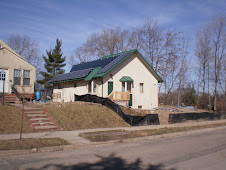
Monday, September 28, 2009

Week of September 14th

Bottom Line Up Front

I took a week's vacation time the week of September 14th to work on the house. I had planned to get most of the clay plastering done (wishful thinking!). I had put the first coat of clay plaster on nearly all the walls, upstairs and downstairs. That took me a good eight days or so (maybe ten?). I hadn't quite finished with the first application of Loma (the base coat), but was getting tired of no color. The color can be added to the finishing coat only (which saves money; some of the pigments cost more that the clay). So I decided to put on the finishing color to the upstairs office. Imagine my surprise when I came back the next day and the clay was cracked and falling off the wall where I had applied the second coat. Long story short, the cement wasn't sealed properly and the clay wouldn't stick. All the clay had to be scraped off all the walls, the walls had to be sealed, and I had to start over. That's why it took me so long to write this iteration, it was just too depressing to write about. Now, for those of you who know how long-winded I can get, skip down to the pictures if you don't want to hear the details.

The outer envelope of the house is made of Faswall. Faswall looks like a big concrete block from a distance, but is actually made of 85% wood chips and 15% portland cement. The mixture is pressed into forms 2' long by 1' deep by 8" high, with two square holes, just like a concrete block. Here's how they look:
You can see that they have quite a rough surface. I wanted to use clay plaster on the inside of the exterior walls. There were a few reasons I wanted to do this: I didn't want to use conventional sheetrock because of the paper and glue; clay is a green, natural product; and clay helps keep humidity levels more even by absorbing humidity when it gets high. At first I thought I could use the clay directly on the walls, but after getting the Faswall blocks, I could see that wouldn't work. I would have had to use 10 times as much clay to seal the holes in the walls as I would to just cover a normal, flat wall. Compounding that wass that the contractor who put up the walls, RockSolid Concrete, did such an awful job at putting up the block that I didn't have anything close to a smooth wall to work with. Some of the blocks were missaligned by 1/4 to 1/2 inch to the blocks above and below. (Now in the contractor's defense, I have to say that the Faswall blocks are difficult to work with, and I was forced to buy "kits" which did not have the right combination of blocks I needed. But he still did a lousy job.) I had to put a browncoat of cement on the walls 1) as a cheap way to fill the holes and 2) to smooth out the wall surface so I could apply the clay. Clay plaster is not a cheap way to go, and is quite labor-intensive, and that's on a perfectly smooth surface.

I hired two guys to do the browncoat. Neither had any experience working with cement, and neither did I, so all in all, it wasn't a very good job. I should have hired a professional. I was trying to save money, but the browncoat ending up costing me way more in labor costs than if I had hired a high priced professional, and that extra cost was before disaster struck with the clay application.

First of all, the walls still aren't close to being flat. They look flat from a few feet away, but if you lay an edge up against the wall, you can see how "not flat" they are. Again, that's what I get for trying to cut costs and not using a professional. The other problem is that when Alegandro, one of the guys, found out I was going to put clay plaster over the cement, he kept telling me it wouldn't stick unless he raised up the rock in the cement. I knew that wasn't true, because I had already tried applying the clay onto a very smooth portion of the cement and it stuck just fine, and I had taken an all day class on clay application (twice, I'm a slow learner) and I knew the clay didn't need much to grab onto. Despite my assurances that he didn't need to do this, he raised up the rock in the cement with a sponge and the clay had a hell of a surface to grab onto. Way too much of a surface, it turned out, as the Loma is only applied the thickness of a credit card. The raised surface came right through the clay.

So I took a mason stone and scrubbed off the too-rough surface. This proved to be a rather arduous task (since I only have one hand I can use), so I hired Heidi next door to do a couple rooms. Since I know nothing about concrete, I didn't realize we were removing the seal by scraping off the surface. Then I had a hard time applying the clay, because even though I sprayed the cement wall with water before I applied the clay, the cement immediately sucked the water out of the clay and dried it out right away. The clay was very difficult to work with, because it dried out so fast, and I couldn't merge the edges. It wasn't until I applied the second coat, though, that the first coat started falling off the wall.

I immediately called American Clay in New Mexico to try to figure out what the problem was. They were extremely helpful and immediately diagnosed the problem. They recommended that I use a sealer over the concrete and explained what the sealer was and how I could identify that I had the right product. It took me a couple hours of calling around to find a dealer that had the sealer I thought was right (there's no national brand of this sealer, I guess--it's called something different depending on where you live). The guy from American Clay said it had to look and smell like Elmer's Glue. There was only one dealer in the Twin Cities that had something, and I bought a five gallon bucket. The first thing I did after I paid for it was open it up and take a whiff. Yep, Elmer's Glue.

By this time it was late Thursday afternoon, and I was having the rain catchment cistern put in on Friday. I tested out the bonding agent (TK Tribond), let it dry, and applied the clay. It stuck. Then I had to go back to the walls with a putty knife and strip off all the clay, brush the walls with a dry scrub brush to get the last bits of clay off, clean the walls of all dust with a brush, and roll on the Elmer's Glue. And start all over again. It's just not very satisfying to put clay on a wall that I already put clay on, and took clay off, and cleaned and dusted off, and rolled bonding agent on.

So that's the bad news. The good news is that I'm much faster applying the clay, that the sealer stops the cement from sucking all the water out of the clay, making the application easier, and after five full work days, I'm pretty much caught up to where I was before. But that five days doesn't count all the time and money (paying others) to get the clay off and re-do everything. The other good news is that before I scraped the clay off the walls, I cleaned up the floor, and then swept up the clay to re-use. That's one good thing about dried clay--you just add water and it becomes clay again (a good reason not to use it in the shower or kitchen).

Moving on to another subject: the Cistern

Because I'm having so much of my yard as garden, I wanted a rain catchment system. I did a lot of research on line and came up with zippo in terms of trying to find a local contractor to put it in for me. So I just went out and bought a 1,400 gallon cistern and figured Jeffrey and I could figure it out. My brother Cliff and his wife Rosa came over to do the digging. Cliff is a master with a Bobcat. At first, he didn't think he would be able to dig a deep enough hole with a Bobcat, but it turned out he was able to do it. Here's Cliff in the Bobcat with Rosa in the bucket, lifiting the cistern up.
He ended up dragging it over to where the hole was going.
Digging the hole. The dirt went to fill spaces around the house which still didn't have enough dirt.

Rosa and Alegandro in the pit digging out the last part by hand.
Getting ready to drop the cistern into the hole.

Here's a picture of Gene Marault, who wanted to learn about clay plastering, and helped cover a wall in the basement. This was before I knew about the seal problem.
This is a couple days later. Gene is applying the bonding agent.

Wednesday, September 9, 2009

More Progress, but Time is Running Out

So, the house is looking more like a real house. I'm not real thrilled about how it looks from the street, however. With such a huge roof and gable, there's too much empty space on the front. It's fine from the inside of the house; it's the outside that looks a little bleak. It will look better when the dumpster is gone and you can see the lower level windows, and when the door and extension between the upper and lower bay windows get painted dark green. Even though I didn't get the garden planted until mid-July, it has grown like crazy. I guess planting in pure compost really makes a difference. I think my dozens of butternut squash will ripen okay, and I can store them all fall and winter in the cold room, so I don't think I'll have to do a lot of freezing. If I do, though, at least I'll be able to do it in the new house. My mom's kitchen is smaller than most bathrooms. I've been canning corn and tomatoes from my brother's garden, and it takes twice as long because I have no counter space to work on at the old house. The tomato plants in my own garden have hundreds of tomatoes. The question is, will it stay warm enough for them to ripen? A few are starting to turn orange, so maybe there's hope.
The next four pictures are in reverse order. My first attempt at clay plastering. Shown below is the north wall of the lower level bedroom completed. The clay plastering is a nightmare compared to the class I took. In class, we applied the clay to wallboard. I'm applying it to a brown coat of cement over the Faswall bricks. The Faswall bricks are not uniform. Even if I had had a competent contractor to build the Faswall block walls (which I did not), the imperfections in the bricks would have still caused problems. I made a big mistake in hiring amateurs to apply the brown coat to the Faswall. First, because of their inexperience, it cost over 50% more to get it put on, since I paid by the hour instead of the job. So instead of saving money, I lost money. Then, the parge coat was very uneven and it's taking me forever to apply the clay so it's somewhat smooth. I'm spending twice as much money (at least) on clay, because I'm having to put it on way thicker that I would on wallboard. The thicker it goes on, the harder it is to smooth out evenly without leaving trowel marks. Then the other thing is that the cement base just sucks the water out of the clay. Instantly. So the clay dries immediately, and it's difficult to get adjoining sections to blend together smoothly. I've been spraying the heck out of the cement right before I apply the clay, but it still dries out immediately. The only good thing about the clay is my labor is free.
Starting my first clay plastering with a small section. You can see how I wet the wall down underneath.
Before plastering.
Wow, the front steps are finally in!
The south yard is a mess!!! Heidi and Devin next door were putting in my retaining wall, and Eberhard Construction was pouring concrete to fix and raise the window wells, and build the front door landing and stairs. The easiest thing would be to put a cement sidewalk down to the street, but want to use VAST pavers instead. VAST pavers look like regular brick, but they are made out of recycled tires. They are installed spaced apart, and are a permeable surface to decrease rainwater runoff.
Heidi and Devin next door are finishing the wall.
Wall is almost complete.
Close-up of the stucco wall pattern.
View of the house from the southeast.
Kitchen cabinets installed. Jeffrey had to assemble some matching ones to fill in the gaps and custom make holders for the wall ovens and the dishwasher.
My Chaska teaching buds, Lucy, Janelle, and Ann, came out to the house to see it and then we had a picnic.
Time is Running Out

My construction loan was initially for one year, which ended September 1st. I was able to get a three-month extension, but I can only get one of those. So December 1st is my drop dead date to get most everything completed. My construction loan turns into a mortgage at that point, and I can’t get any more money from the construction loan.

Jeffrey and I did an assessment of where we are at in terms of completion of what is left to do, and it wasn’t pretty. Although things have been progressing at a pretty good pace for the last couple months, we lost time while I was injured, and we never made up for time we lost last fall and winter with contractor problems. We’re both going to have to put in some serious time to finish up. I had hoped to move in by November 1st, but I doubt that will happen. There are only a few more things which MUST be completed to get a certificate of occupancy, and we’ll focus on those. The main one is completing the HVAC. White Bear Mechanical went bankrupt in June. The former owner promised to complete the job, but hasn’t come through, so we’re looking for a new contractor to finish the job. We must have one working bathroom, and that won’t be a problem. The sidewalk from the front door to the street has to be in. That’s one of my projects, with VAST permeable pavers.

Before my mom and I can move in, though, the main level must be totally completed. The lower level, where I’m going to live, doesn’t have to be 100%, but my mom’s area must be 100%. She couldn’t’ take the disruption of ongoing finishing work. Moving out of the house she’s lived in for 40 plus years will be disruption enough. So Jeffrey and I are focusing on the interior window framing, the interior doors (both Jeff’s), and the bathroom tiling (mine), as well as the clay plastering and painting (both mine). I’m taking a week off to work on the house next week, so we’ll see how the progress moves along.

Wednesday, August 19, 2009

August 19th Update

Here are some of the kitchen cabinets being stored in the dining room. After 18 months of storage in my garage, I was finally able to move them over to the house. Jeffrey has temporarily taken off his Construction Management hat (http://www.swainhart.com/) and put on his carpenter's hat, and is going to do the kitchen for me. Buying the cabinets used from the ReUse Center saved me a ton of money, as new "greenly made" cabinets are quite expensive. The preliminary estimates I had gotten were between $20,000 and $25,000 for the kitchen. The used cabinets I bought, which are oak and in very good shape, cost about $1,600. Jeffrey is having to do quite a bit of cannibalizing to make the cabinets fit properly into the kitchen. He's having to build sections from scratch to house the wall ovens and dishwasher. He's a very smart guy, and very creative. He's making everything fit together really well, and saving me a bundle in the process. Finally, we were ready to do the tubing for the radiant in-floor heating on the main level. Below shows the tubes installed, looking from the living room back through the dining room to the kitchen.
Below are the tubes in the living room, and below that, the finshed poured Gypcrete floor.

Below are the tubes looking back through the bathroom hallway to the back bedroom, and below that, the Gypcrete floor over the tubes. One of the very last things I'll do is put on a bamboo floor over the Gypcrete.
I got my garden in very late, as I was planning on doing it the first week in June, but because of my injuries, didn't get it in until mid-July. I'm amazed that everything grew so fast and I'm actually going to get a full crop of tomatoes, peppers, cucumbers, squash, and cantelope.
One of the best things to happen was the start of the stucco. Although the manufacturors of the FasWall say stucco can be applied directly to the FasWall blocks with no wire mesh, my stucco contractor, Everlast Stucco, didn't want to do that. He would have had to put the wire mesh on the wooden gables, but he also put it on the blocks, which was fine with me. The two pictures below show the wire mesh installed.
Finally, the brown coat (yes, I know it's grey in color) is on. I had just sprayed it before I took the picture. I'm spraying the entire house every day for 10 days to cure the brown coat so it won't crack. Everlast Stucco will come back next Monday to apply the stucco finish. The outside is actually looking like a real house now.

Tuesday, July 21, 2009

Progress for July

Finally, the roof is completed and the 9 solar thermal panels are installed. Most of the basic landscaping has been completed and there are no piles of dirt anymore. There's still quite a bit of work to be done on the outside. The stucco job should begin next week or the week after. The front step landing and steps will be done soon. Some work has to be done on the south side window wells, which have sunk because they weren't installed properly by RockSolid Concrete. I'm putting a short retaining wall on the south side, near the property line, since I had to lower the side yard by about 2 1/2 feet due to errors in elevation by the architect. Otherwise, my basement windows on the south side would have been buried 2 1/2 feet below grade, letting in no air or light at all.
I finally was able to return to work at the end of July after my injury working on the house. I will be in physical therapy for another two months, and won't be able to do a lot of the finishing work I had intended to do. I'm still hoping to do some of it, but it will be difficult with only one hand.
I was going to put in a porch roof over the front door, extending to the bay window, but scaled that down due to budget considerations. Here's the mini-roof over the bay window.
I used Dens-Armor sheet rock, which is paperless, instead of the conventional stuff which has glue and cardboard on one side. It costs about twice as much, but is very mold-resistant, and has nothing to attract bugs. It also doesn't burn. It's a very green product.
This view is looking up at two of the three skylights in the stairwell, which will let in light as well as provide venting for hot air out of the house.
This is the view from the living room looking back towards the back bedroom, with the upstairs bath in the foreground.
Below is taken pretty much from the same spot, but looking through the interior window, which lets in light, through to the rear door.
The front bedroom/office, which will have glass french doors to open the living room up.
The inside looks a lot different with the walls in. Hopefully, the next update will be sooner than later.

Wednesday, June 24, 2009

A Slow June

June was a slow month. I was severely injured when I was in the basement nailing foam insulation to the basement ceiling and my wooden stepladder collapsed under me. I fell backwards, bouncing off the wall, and landed on the cement floor with my hands behind me, instinctively trying to break the fall. My left wrist and lower arm were literally shattered. The surgeon used bone cement to glue the fragments back together, as well as inserting a long plate holding the bigger pieces together with a dozen screws. There are also three pins which hopefully will be removed soon. The cast presses on them and it hurts when I move my arm too much. I'll permanently lose some mobility in the wrist, but hopefully will get back most of the use of my fingers. I still feel very lucky. It could have been so much worse.
Some pictures: my brother Cliff removed the driveway running through the back yard, and this picture was taken after I had started filling in the hole. I was just starting to get the hang of the Bobcat before the accident.
Here's the asphalt waiting to be picked up to be recycled. You can see the work Cliff did backfilling around the front window wells.
Here are the solar heat storage and heat transfer tanks.
Finally the sheet rock has been started! This is standing in the living room, looking towards the rear. The kitchen is on the right, the master bedroom windows on the right.
This is a view from the kitchen to the living room on the right. The office/guest bedroom is on the left, behind the dining room.
The front before backfilling. See the second picture above and current view to see the backfill.
The north window wells being installed.
The north window wells installed. I did the backfill myself with the bobcat.
The pots contain all the plants I ordered, mostly fruit plants. We are WAY behind on the landscaping.
More plants. Many I planted from seed. and they are still sitting there, waiting to be planted. The garden behind the pots is my neighbors'.
This is the wooden stepladder. If you have one, get rid of it. They are not safe! When I tell people how I was injured, everyone has their own horror story about stepladders, many worse than mine.

Friday, June 5, 2009

The Good, the Bad, and the Ugly

Although this is the same date as my last published blog, I wrote that one on May 15th, while I was in New Orleans on business. I was waiting for more to happen, but it never did, and time got away from me.

So today is June 5th, and I guess I should talk about the ugly. I've done a lot of light construction work in the past, and lots of work on ladders. I've never been seriously injured that I can remember. But that changed when I had a wooden stepladder collapse under me last Saturday at the house. Alagandro and I were nailing solid foam insulation on the underside of the first floor, to keep the heat from the radiant in-floor tubing radianting upwards. We both were on 5' ladders, standing between the rafters. I was on the fourth rung or so, and when I took a step down, the ladder collapsed. It shattered, and there wasn't time to do anything but fall. I fell backwards from about five feet up, landing on both wrists and my rear end. My left wrist was shattered; the surgeon said the bones looked like corn flakes. My right wrist was badly sprained, but not broken. My back hurt pretty badly, but turned out not to be broken, either. Overall, I think I got off pretty easily. I hit my head pretty hard on the wall. I could have broken my neck or back, or both arms. The wrist is pretty bad, but things could be a lot worse.


One good thing is that all the pain medications have helped my back pain. I'm hoping I'll be able to go back to work next week.


Progress on the house has been moving along. The basement floor has been polished, the sheetrock will be hung this week and next, and we have a contract for the stucco.


My brother, Cliff, and his wife Rosa, are going to help me with landscaping this weekend, and I can finally get some plants in. My injury will cause things to slow down, but not stop.

May Progress from May 15th

The problem with the roof and solar panels hasn’t been fixed yet, so I’m still unhappy with that. I’ve been assured this is going to be fixed, so stay tuned.

I’ve been away for the past two weeks on business, but was home for last weekend. My brother Cliff and his wife Rosa came over to the house for a few hours to help me with some landscaping. I have Cliff’s bobcat there temporarily. He moved some pallets and equipment around which were in the way, and finished filling in the place where the driveway had been. When my lot was adjoined to the Quinces’ lot next door, the owner put in a large horseshoe driveway which went around the perimeter of the property. I took out the part of the driveway which cut through my backyard, and will use what’s left of the driveway along the north side of the property. Part of the driveway was taken out when we dug the hole for the basement, and the asphalt driveway as a whole is not in that good of shape. It was old anyway, and all the heavy equipment on it didn’t help. But it is still a useable driveway, and eventually I’ll replace the asphalt with permeable pavers.

I’m told that Innovative Power Systems (IPS) is busy installing the solar apparatus in the basement mechanical room. The schedule for now is that Concrete Treatment, Inc. is polishing the basement cement floor. This will give it a finished look and make it much easier to keep clean. I’ll put area rugs on top in some places, I’m sure. But I won’t have the problem of stepping out of bed onto a cold cement floor, because the floor will always be warm in the winter, due to the radiant in-floor heating.

Once the basement floor is done (hopefully Monday or Tuesday), we will begin hanging the sheetrock. I originally was going to use magnesium oxide (MgO) board, which will not mold. There were a couple things that made me forgo the MgO board in favor of paperless sheetrock. The cost was the big item: MgO board costs about 4 times as much as conventional sheetrock. Although the U.S. has plenty of gypsum mines (that’s what sheetrock is made of), it has no magnesium oxide mines; they are all in Asia, mostly China. It’s not very “green” to use materials shipped halfway around the world. Instead, I’m using DensArmor, a paperless sheetrock. It’s the glue and cardboard that make conventional sheet rock undesirable, because the paper burns, grows mold, and it and the glue are food for bugs. DensArmor has a fiberglass mesh to hold it together instead of cardboard. It’s more expensive than conventional sheetrock, but I’d rather not have the VOCs from the glue, and the potential for mold.

Last weekend I finished filling in the north side of the house, where new window wells had been put in. One of the things that were left out of the building plans were the window wells. RockSolid Concrete put three cement window wells on the south side, but since they weren’t properly set on footings, they sank when the ground thawed (they were poured in the winter) and have pulled away from the house. Two of them aren’t too bad, but the third one has pulled away from the house quite a bit. RockSolid Concrete won’t fix them, and I won’t pay for them, so I guess I’m stuck with trying to fix the problem. The metal window wells on the north side, next to the driveway, look really good. Jeffrey Swainhart ordered them and installed them. They are close enough to the house to leave enough driveway there to use for my car. I built the house as far to the north as I could, to take advantage of the sun on the south side.

I’m still hoping to be able to get the house finished by the end of the summer. There are some big projects which still need to be done. I will be applying the clay plaster to the walls, and need to take a couple weeks vacation time to do that. The radiant in floor heating has yet to be installed on the first floor, mostly because the sheetrock hasn’t been hung yet. Once the sheetrock and floor are completed, we can start doing things like hanging doors, installing kitchen and bathroom cabinets, and doing the finishing work around the house. Although the house is wired and has plumbing installed, all the fixtures will need to be put in, and that can’t be done until the sheetrock and first floor are done. Nothing on the outside of the house is finished except the roof. The outside has to have stucco put on and I’m not sure how I’m going to finish the gables yet.

I’m hoping to accomplish a lot of landscaping this weekend. My sister Cathy, the landscape architect, is in town, staying with our mom while I’m away. I’ll have a full day with her to lay out the landscaping plan. I already bought quite a few plants, perennials, because the nursery’s stop selling things by the end of May. So I wanted to get my asparagus, fruit trees, raspberry canes, etc. before they disappeared, not to be seen until next spring. I have containers all over my mom’s yard and porch, full of plants. I’m hoping to get some of my plastic lumber soon and start laying out some raised beds. I still have a big pile of dirt in the back, but I think I can start putting some things in on the south side and work around the pile. Another thing to do that I have forgotten: I need to put a retaining wall along the south side, since I had to lower the elevation there. It’s about a two and a half foot drop from my neighbor’s yard. I lowered the elevation because the basement windows, which were supposed to be at ground level, are two feet below the ground.

More updating later…