Bottom Line Up Front
I took a week's vacation time the week of September 14th to work on the house. I had planned to get most of the clay plastering done (wishful thinking!). I had put the first coat of clay plaster on nearly all the walls, upstairs and downstairs. That took me a good eight days or so (maybe ten?). I hadn't quite finished with the first application of Loma (the base coat), but was getting tired of no color. The color can be added to the finishing coat only (which saves money; some of the pigments cost more that the clay). So I decided to put on the finishing color to the upstairs office. Imagine my surprise when I came back the next day and the clay was cracked and falling off the wall where I had applied the second coat. Long story short, the cement wasn't sealed properly and the clay wouldn't stick. All the clay had to be scraped off all the walls, the walls had to be sealed, and I had to start over. That's why it took me so long to write this iteration, it was just too depressing to write about. Now, for those of you who know how long-winded I can get, skip down to the pictures if you don't want to hear the details.
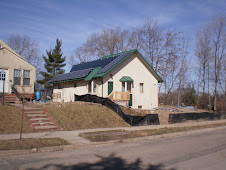
The outer envelope of the house is made of Faswall. Faswall looks like a big concrete block from a distance, but is actually made of 85% wood chips and 15% portland cement. The mixture is pressed into forms 2' long by 1' deep by 8" high, with two square holes, just like a concrete block. Here's how they look:

You can see that they have quite a rough surface. I wanted to use clay plaster on the inside of the exterior walls. There were a few reasons I wanted to do this: I didn't want to use conventional sheetrock because of the paper and glue; clay is a green, natural product; and clay helps keep humidity levels more even by absorbing humidity when it gets high. At first I thought I could use the clay directly on the walls, but after getting the Faswall blocks, I could see that wouldn't work. I would have had to use 10 times as much clay to seal the holes in the walls as I would to just cover a normal, flat wall. Compounding that wass that the contractor who put up the walls, RockSolid Concrete, did such an awful job at putting up the block that I didn't have anything close to a smooth wall to work with. Some of the blocks were missaligned by 1/4 to 1/2 inch to the blocks above and below. (Now in the contractor's defense, I have to say that the Faswall blocks are difficult to work with, and I was forced to buy "kits" which did not have the right combination of blocks I needed. But he still did a lousy job.) I had to put a browncoat of cement on the walls 1) as a cheap way to fill the holes and 2) to smooth out the wall surface so I could apply the clay. Clay plaster is not a cheap way to go, and is quite labor-intensive, and that's on a perfectly smooth surface.
I hired two guys to do the browncoat. Neither had any experience working with cement, and neither did I, so all in all, it wasn't a very good job. I should have hired a professional. I was trying to save money, but the browncoat ending up costing me way more in labor costs than if I had hired a high priced professional, and that extra cost was before disaster struck with the clay application.
First of all, the walls still aren't close to being flat. They look flat from a few feet away, but if you lay an edge up against the wall, you can see how "not flat" they are. Again, that's what I get for trying to cut costs and not using a professional. The other problem is that when Alegandro, one of the guys, found out I was going to put clay plaster over the cement, he kept telling me it wouldn't stick unless he raised up the rock in the cement. I knew that wasn't true, because I had already tried applying the clay onto a very smooth portion of the cement and it stuck just fine, and I had taken an all day class on clay application (twice, I'm a slow learner) and I knew the clay didn't need much to grab onto. Despite my assurances that he didn't need to do this, he raised up the rock in the cement with a sponge and the clay had a hell of a surface to grab onto. Way too much of a surface, it turned out, as the Loma is only applied the thickness of a credit card. The raised surface came right through the clay.
So I took a mason stone and scrubbed off the too-rough surface. This proved to be a rather arduous task (since I only have one hand I can use), so I hired Heidi next door to do a couple rooms. Since I know nothing about concrete, I didn't realize we were removing the seal by scraping off the surface. Then I had a hard time applying the clay, because even though I sprayed the cement wall with water before I applied the clay, the cement immediately sucked the water out of the clay and dried it out right away. The clay was very difficult to work with, because it dried out so fast, and I couldn't merge the edges. It wasn't until I applied the second coat, though, that the first coat started falling off the wall.
I immediately called American Clay in New Mexico to try to figure out what the problem was. They were extremely helpful and immediately diagnosed the problem. They recommended that I use a sealer over the concrete and explained what the sealer was and how I could identify that I had the right product. It took me a couple hours of calling around to find a dealer that had the sealer I thought was right (there's no national brand of this sealer, I guess--it's called something different depending on where you live). The guy from American Clay said it had to look and smell like Elmer's Glue. There was only one dealer in the Twin Cities that had something, and I bought a five gallon bucket. The first thing I did after I paid for it was open it up and take a whiff. Yep, Elmer's Glue.
By this time it was late Thursday afternoon, and I was having the rain catchment cistern put in on Friday. I tested out the bonding agent (TK Tribond), let it dry, and applied the clay. It stuck. Then I had to go back to the walls with a putty knife and strip off all the clay, brush the walls with a dry scrub brush to get the last bits of clay off, clean the walls of all dust with a brush, and roll on the Elmer's Glue. And start all over again. It's just not very satisfying to put clay on a wall that I already put clay on, and took clay off, and cleaned and dusted off, and rolled bonding agent on.
So that's the bad news. The good news is that I'm much faster applying the clay, that the sealer stops the cement from sucking all the water out of the clay, making the application easier, and after five full work days, I'm pretty much caught up to where I was before. But that five days doesn't count all the time and money (paying others) to get the clay off and re-do everything. The other good news is that before I scraped the clay off the walls, I cleaned up the floor, and then swept up the clay to re-use. That's one good thing about dried clay--you just add water and it becomes clay again (a good reason not to use it in the shower or kitchen).
Moving on to another subject: the Cistern
Because I'm having so much of my yard as garden, I wanted a rain catchment system. I did a lot of research on line and came up with zippo in terms of trying to find a local contractor to put it in for me. So I just went out and bought a 1,400 gallon cistern and figured Jeffrey and I could figure it out. My brother Cliff and his wife Rosa came over to do the digging. Cliff is a master with a Bobcat. At first, he didn't think he would be able to dig a deep enough hole with a Bobcat, but it turned out he was able to do it. Here's Cliff in the Bobcat with Rosa in the bucket, lifiting the cistern up.

 He ended up dragging it over to where the hole was going.
 Digging the hole. The dirt went to fill spaces around the house which still didn't have enough dirt.
 Rosa and Alegandro in the pit digging out the last part by hand.
 Getting ready to drop the cistern into the hole.

 Here's a picture of Gene Marault, who wanted to learn about clay plastering, and helped cover a wall in the basement. This was before I knew about the seal problem.
 This is a couple days later. Gene is applying the bonding agent.

No comments:
Post a Comment